Mastering Smoked Tri Tip: Your Guide to Unforgettable Flavor and Tenderness
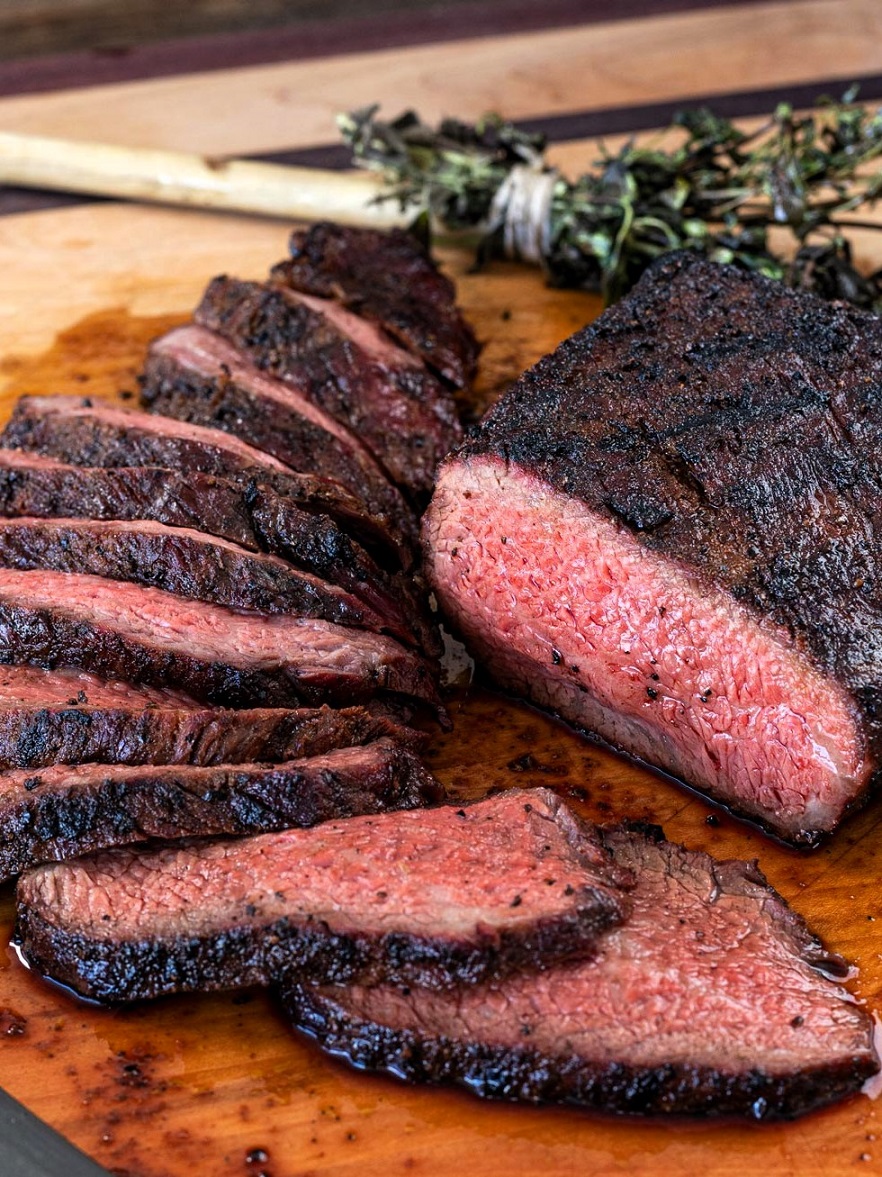
Imagine a centerpiece roast that commands attention, tantalizes taste buds, and leaves your guests raving. That's the magic of Smoked Tri Tip: The Show-Stopping Roast for Any Gathering. This often-underestimated cut of beef, when treated to the alchemy of smoke and heat, transforms into an incredibly juicy, melt-in-your-mouth experience brimming with deep, savory flavor. Forget dry, tough roasts; a properly prepared smoked tri tip delivers a beautiful pink interior from edge to edge, promising delicious results every single time.
Hailing predominantly from Western America, particularly California, the tri tip's popularity is rapidly spreading across the nation, and for good reason. It's a budget-friendly beef roast that offers immense flavor and tenderness when cooked correctly. Today, we're going to unlock the secrets to preparing Achieve Perfect Smoked Tri Tip: Low and Slow with a Fiery Finish, guiding you through the essential three steps that guarantee juicy perfection. Prepare to impress like a seasoned pitmaster!
The Anatomy of Perfection: Understanding the Tri Tip Cut
Before we dive into the cooking process, let's get acquainted with our star ingredient: the tri tip. This distinctive, triangular-shaped cut comes from the lower portion of the bottom sirloin. Its unique marbling and lean-to-fat ratio contribute to its incredible tenderness and rich, beefy flavor when handled with care. Most tri tips you'll find at your local butcher or grocery store will be pre-trimmed, weighing in at a manageable 2-3 pounds. However, an untrimmed cut can be nearly 5 pounds, featuring a thicker fat cap and a layer of silverskin.
Pro Tip: Trimming Your Tri Tip
While many butchers trim tri tip perfectly, a little extra attention can elevate your results.
- Fat Cap: If present, decide whether to trim it completely or leave a thin layer (about 1/4 inch). A thin layer can render down, adding moisture and flavor, especially during a longer smoke.
- Silverskin: This tough, silvery membrane will not render or become tender. Always remove it using a sharp knife, sliding the blade carefully between the silverskin and the meat, pulling the membrane taut as you go.
- Grain Direction: Tri tip is unique because its muscle fibers run in two different directions. Identifying these before cooking is crucial for proper slicing, which directly impacts tenderness. Take a moment to observe the grain; you'll typically see a pivot point where the grain shifts. Marking this mentally (or even making a small notch) will save you guesswork later.
Step 1: The Flavor Foundation – Prep and Seasoning
The journey to an unforgettable smoked tri tip begins long before it hits the grates. Proper preparation and seasoning are the cornerstones of flavor and moisture. This initial step is your chance to infuse the meat with the deliciousness that will develop and intensify during the smoking process.
Prepping for Success
Once your tri tip is trimmed to your liking, pat it thoroughly dry with paper towels. A dry surface is critical for two reasons:
- It helps create a better crust (or "bark") during smoking and searing.
- It allows your chosen seasoning to adhere more effectively.
Crafting Your Signature Seasoning
For a first-timer, simplicity reigns supreme. A classic blend of kosher salt, fresh ground black pepper, and garlic powder liberally applied to all sides is an excellent starting point. This foundational trifecta enhances the beef's natural flavor without overpowering it. However, the world of BBQ rubs is vast and exciting, offering endless possibilities for personalization:
- Santa Maria Style: Embrace the tri tip's Californian roots with a Santa Maria rub, often featuring salt, pepper, garlic, and sometimes onion powder, paprika, or even a touch of chili powder.
- Smoky & Savory: Add paprika (sweet or smoked), onion powder, a hint of brown sugar for caramelization, and a touch of cayenne for a subtle kick.
- Coffee Rubs: Finely ground coffee can add an incredible depth and dark crust to beef, pairing beautifully with the smoky notes.
Don't be afraid to experiment! BBQ is about creating food you love. Once seasoned, let the tri tip rest at room temperature for 30-60 minutes before smoking. This allows the rub to penetrate slightly and helps the meat cook more evenly.
Step 2: The Heart of the Flavor – Low and Slow Smoking
This is where the magic truly happens. Smoking the tri tip low and slow infuses it with that iconic smoky flavor and gradually raises its internal temperature, ensuring an incredibly tender and juicy result that's cooked beautifully pink from edge to edge. You can use any type of smoker—pellet, offset, electric, or even a kettle grill with indirect heat—as long as you can maintain a consistent temperature of 225°F (107°C).
Smoking Essentials: Temperature, Wood, and Monitoring
- Consistent Temperature: Maintaining 225°F is paramount. Fluctuations can lead to uneven cooking or a tougher texture.
- Wood Selection: Complement the beefy flavor with mild to medium hardwoods. Oak is a classic choice for beef, offering a robust but not overpowering smoke. Hickory provides a stronger, bacon-like flavor, while cherry or apple woods offer a sweeter, fruitier smoke and a beautiful mahogany color to the meat.
- Internal Temperature Monitoring: This is non-negotiable for perfectly cooked meat. Insert a reliable leave-in meat thermometer into the thickest part of the tri tip, avoiding any large pockets of fat or bone.
- Smoking Time: A 2-3 pound tri tip will typically take between 1 to 2 hours at 225°F. However, time is merely a guide; always cook to temperature, not strictly to time.
You'll want to pull your tri tip off the smoker when its internal temperature reaches 5-10 degrees below your final target doneness. This accounts for carryover cooking during the searing and resting phases. For a perfect medium-rare (target 130-135°F), aim to pull it around 120-125°F.
Step 3: The Fiery Finish – Searing and Resting for Perfection
The final two stages are just as crucial as the previous ones, completing the transformation of your smoked tri tip into a culinary masterpiece. The high-heat sear locks in juices and develops an irresistible crust, while proper resting ensures maximum tenderness and juiciness.
The Art of the Sear
Once your tri tip reaches its pull temperature, remove it from the smoker and crank up your grill or cast-iron skillet to high heat. The goal here is to achieve a beautiful, dark, flavorful crust (the Maillard reaction) in a short amount of time, without overcooking the interior.
- Method: Place the tri tip directly over the high heat. Sear for 2-3 minutes per side, rotating occasionally to get an even crust. The total searing time should be around 5-10 minutes, depending on the heat of your grill and your desired crust.
- Visual Cue: Look for a rich, dark brown, almost black crust. If you're using a cast-iron skillet, a little oil with a high smoke point (like avocado or grapeseed) can aid in browning.
The Critical Rest
Once seared, remove the tri tip from the heat and transfer it to a cutting board. Cover it loosely with foil and let it rest for at least 15 minutes, or even up to 20 minutes for larger roasts. This step is non-negotiable! Resting allows the muscle fibers to relax and the internal juices, which have been pushed to the center by the heat, to redistribute evenly throughout the meat. Cutting too early will result in a gush of flavorful juices onto your cutting board instead of remaining in your slice, leading to a drier, less flavorful experience.
Slicing Against the Grain
Remember that vital note about the tri tip's grain direction? Now's the time to use that knowledge. Because the grain changes direction, you'll need to cut the roast into two or three sections along the line where the grain shifts, then slice each section against the grain into thin pieces. Slicing against the grain shortens the muscle fibers, making each bite incredibly tender.
Conclusion: Your Smoked Tri Tip Triumph
You've done it! By mastering these three essential steps—meticulous preparation and seasoning, patient low-and-slow smoking, and a decisive high-heat sear followed by a crucial rest—you’ve transformed a simple cut of beef into a magnificent smoked tri tip. This method guarantees a juicy, tender, and deeply flavorful roast that will make you the hero of any backyard gathering or family meal. So fire up your smoker, gather your favorite sides, and prepare to indulge in the incredible experience of perfectly cooked smoked tri tip. Your culinary journey to juicy perfection has just begun!
